Even though it’s easy to take screenshots in Windows (just press Windows+PrtScn buttons), the default function is minimal. There is no robust editing tool available, it lacks many automation features, and taking screenshots in different ways can be a hassle.
If you need to take screenshots often, it’s compulsory to get a third-party screenshot software that fulfills all your needs. These tools can help you take screenshots in multiple ways, save them in your preferred place automatically (online/offline), and annotate them with powerful editing tools.
Best Screenshot Tool for Windows 10

Greenshot
If you want a simple, free, yet powerful screenshot tool, then Greenshot is the best choice, in my opinion. It’s an open-source app that works from the taskbar to let you quickly take screenshots in multiple ways. You can take region, active window, full screen, last region, and many screenshots using UI and keyboard shortcuts.
You can configure it to save screenshots directly to a specific folder or even send them to a program. There is also an option to upload screenshots to Imgur as soon as you take them. It’s also extremely light on resources and works from the taskbar to have minimal interference in your work.
PicPick
I have used PicPick for near 2 years before moving to Greenshot as I needed something simpler. However, if you want a screenshot tool that also has a powerful editor, then PicPick beats other screenshot tools by a mile. It offers 8 ways to capture a screenshot and then opens it in its editor.
The editor offers all the common features to edit images, including effects, annotations, pixel ruler, resize/crop, draw, and much more. All the screenshots taken are listed in the PicPick interface to manage and edit, and you can share them anywhere online using the Share tab.
PicPick is completely free for personal use but without any customer support. You need to buy the paid version for commercial use.
Snagit
Snagit is a premium screenshot and recording tool with a 15-days free trial to test out the tool. It’s very powerful when it comes to taking screenshots, editing them, and sharing them. It offers up to 12 ways to take screenshots, with each option having further settings to adjust the behavior.
The taken screenshots open in Snagit editor, which offers all the needed editing features plus a gallery to view all your screenshots in one place. It also has a list of websites for images and cloud storage where you can share your screenshots immediately.
ShareX
If sharing the screenshots with other people or websites is important to you, then ShareX is the screenshot software you want. It has 7 ways to capture a screenshot, and you can also record video and Gifs. There is also a handy auto-capture feature that automatically takes screenshots after a set interval.
ShareX offers dedicated menus to upload your screenshots to many different online services, and you can manage their accounts right from the ShareX interface. You can also get shareable short links for easy sharing.
Overall, the app is highly customizable to the point it can be a bit overwhelming, and there are some side tools, too, like a built-in OCR tool.
Lightshot
As the name suggests, this is a very minimal screenshot software that is extremely light and easy to use. Lightshot works from the taskbar just like Greenshot, but you can only take region or full-screen screenshots with it.
Besides being easy on resources, it also lets you upload a screenshot to its website to share with anyone online without needing to sign in. You can also sign up to save your screenshots online and manage them.
Even though it’s a light screenshot tool, it still offers a basic editor to annotate images and share them online.
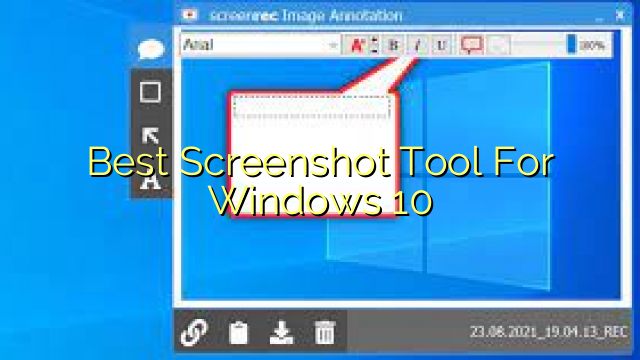
ScreenRec
It’s actually both a screenshot tool and a screen recorder, but I am mainly going to talk about the screenshot tool. ScreenRec sits on the right side of your screen and lets you quickly capture a screenshot. Although, you will have to manually select a region to take a screenshot.
The screenshot taken will open in a minimal editor where you can add arrows and text to the image and then save it. The tool has its own gallery where you can view and manage all your screenshots and recordings. If you’ll sign-up for the free account, you can also get private, shareable links for your screenshot and 2GB of free cloud storage.
It’s free to use but comes with limited cloud storage, and you have to sign up to use online features.
Gyazo
Gyazo works both as a screenshot tool and an online photo manager. The screenshots you take are immediately uploaded to the Gyazo website under a dedicated link. You can share this link with anyone to share the screenshot or collaborate.
Its free version is only good for taking screenshots and easily sharing them online. If you want to manage everything online, you need to get the Gyazo Pro version ($3.99/month) that offers unlimited access to saved screenshots and editing features. You can also record videos and game replays and manage them online.
Apowersoft
I must mention that this tool keeps prompting you to upgrade to the paid version very frequently. The paid version of Apowersoft Screen Capture does have some unique features that make it worth the money.
You can take screenshots in 12 different ways, including different shapes to take screenshots. The screenshots open up in its editor that looks quite like the MS Paint app in Windows, but it has some cool annotating features.
The more interesting feature is the Task scheduler, which lets you schedule when the app will automatically take screenshots. You can even set it on repeat to continuously take screenshots over time.
Awesome Screenshot
If you mostly take screenshots in your browser and apps or don’t want to install the screenshot in Windows itself, then a Chrome extension might be better for you. Awesome Screenshot is a Chrome extension for screenshots that works from your browser to take screenshots of Chrome and other active apps.
You can use multiple ways to take screenshots and then edit them in a new tab with some basic editing tools. Once edited, the screenshots can be shared online using built-in links to websites, or you can upload them to Awesome Screenshot cloud storage. Uploading to Awesome Screenshot cloud storage lets you share screenshots privately, and you can manage the images online.
Awesome Screenshot also allows you to take full-page screenshots of web pages without scrolling down.
You will need to get the Pro version to access extra editing tools and use cloud storage features.
Nimbus Capture
Nimbus Capture is a screenshot, video recording, and GIF maker software that is easy to use and quickly gets the job done. Even though its video recording and GIF-making features are gated by Pro subscription, its screenshot feature is actually free to use.
You can take region or full-screen screenshots. I personally really liked its after-screenshot behavior, where it immediately opens up a small widget that lets you annotate the screenshot at the spot and download/share it. The screenshots can also be uploaded to Nimbus Capture online account, where you can add notes and manage them.
Greenshot

What is Greenshot?
Greenshot is a light-weight screenshot software tool for Windows with the following key features:
- Quickly create screenshots of a selected region, window or full screen; you can even capture complete (scrolling) web pages from Internet Explorer.
- Easily annotate, highlight or obfuscate parts of the screenshot.
- Export the screenshot in various ways: save to file, send to printer, copy to clipboard, attach to e-mail, send Office programs or upload to photo sites like Flickr or Picasa, and others.
…and a lot more options simplifying creation of and work with screenshots every day.
Being easy to understand and configurable, Greenshot is an efficient tool for project managers, software developers, technical writers, testers and anyone else creating screenshots.
How to Use Greenshot
Creating a screenshot
You can create a screenshot either by using the Print Screen key on your keyboard or by right clicking the Greenshot icon in the task tray.
There are several options for creating a screenshot:
Capture region
Keyboard Shortcut: Print Screen
The region capture mode allows you to select a part of you screen to be shot.
After starting region mode, you will see a cross-hair pointing out the mouse position on the screen. Click and hold where you want one of the corners of your screenshot to be. Still holding down the mouse button, drag the mouse to define the rectangle to be shot. When the green rectangle covers the area you want to be captured in your screenshot, release the mouse button.
You can use the Space key to switch between region and window mode.
If you want to capture an exact area, it might be easier to select the initial screenshot area slightly larger and to crop the screenshot afterwards using Greenshot’s image editor.
Capture last region
Keyboard Shortcut: Shift + Print Screen
If you did a region or window capture before, you can capture the same region again using this option.
Capture window
Keyboard Shortcut: Alt + Print Screen
Creates a screenshot of the window which is currently active.
The settings dialog offers an option not to capture the active window right away but allowing you to select one interactively. If this option is selected, you may select a window by clicking it (As in region mode, Greenshot will highlight the area that will be captured). If you want a child window to be captured (e.g. a browser viewport (without toolsbars etc.) or a single frame of a web page using framesets) point the mouse cursor to the window and hit the PgDown key. After doing so, you can select child elements of the window to be captured.
Capturing context menus on their own is different: using the “Capture window” shortcut would make the context menu disappear, and obviously the same would happen if you used Greenshot’s context menu in order to create the screenshot. If you want to capture a context menu you have just brought up by right-clicking anything, simply activate region mode Print Screen, then press the Space key.
Capture full screen
Keyboard Shortcut: Control + Print Screen
Creates a screenshot of the complete screen.
Capture Internet Explorer
Keyboard Shortcut: Control + Shift + Print Screen
Comfortably creates a screenshot of a web page currently opened in Internet Explorer. Use Greenshot’s context menu to select the Internet Explorer tab to capture, or hit Crtl + Shift + Print to capture the active tab.
Using the image editor
Greenshot comes with an easy-to-use image editor, providing a handy feature set to add annotations or shapes to a screenshot. It even allows to highlight or obfuscate parts of your screenshot.
Greenshot’s image editor may not only be used for screenshots. You can also open images for editing from a file or from clipboard. Simply right-click the Greenshot icon in the task tray and select Open image from file or Open image from clipboard, respectively.
By default, the image editor will be opened whenever a screenshot is captured. If you do not want to use the image editor, you can disable this behavior in the settings dialog.
Drawing shapes
Select one of the shape drawing tools from the toolbar on the left hand side of the image editor or from the Object menu. There is also a key assigned to each tool for your convenience.
Available shapes are: rectangle R, ellipse E, line L, arrow A and freehand line F.
Click, hold down the mouse button and drag to define position and size of the shape. Release the mouse button when you are done.
You can move or resize existing shapes after selecting the selection tool ESC from the toolbar. For every element type there is a specific set of options available to change the look of the element (e.g. line thickness, line color, fill color). You can change the options for an existing element after
selecting it, but also for the next element to be drawn after selecting a drawing tool.
You can select multiple elements for editing at a time. In order to select multiple elements, hold down the Shift key while clicking the elements.
If you want to draw equilateral shapes (e.g. force a rectangle to be a square) hold down Shift while drawing. When drawing lines or arrows, holding down Shift results in the line’s angle being rounded in steps 15°.
You can also use Shift if you want to resize an existing object maintaining it’s aspect ratio.
When drawing or scaling, you can hold down Ctrl to have the object anchored in it’s geometrical middle. I.e. the object is resized in the opposite direction, too. (This is very handy if you want to draw an ellipse around something on your screenshot.)
Adding text
Usage of the text tool T is similar to the usage of the shape tools. Just draw the text element to the desired size, then type in the text.
Double click an existing text element to edit the text. Hit Return or Enter when you have finished editing.
If you need to insert line breaks within a text box, hit Shift + Return or Shift + Enter.
Highlighting things
After selecting the highlight tool H, you can define the area to be highlighted exactly like you would draw a shape.
There are several options for highlighting, which you can choose from by clicking the leftmost button in the toolbar on top:
- Highlight text: highlights an area by applying a bright color to it, like
an office text highlighter - Highlight area: blurs* and darkens everything outside the selected area
- Grayscale: everything outside the selected area will be turned to grayscale
- Magnify: the selected area will be displayed magnified
Obfuscating things
Obfuscating parts of a screenshot is a good idea if it contains data which is not intended for other people to see, e.g. bank account data, names, passwords or faces on images.
Use the obfuscate tool exactly like the highlight tool.
Available options for obfuscation are:
- Pixelize: increases the pixel size for the selected area
- Blur*: blurs the selected area
* Depending on the performance of your computer, applying a blur effect might slow down Greenshot’s image editor. If you feel the image editor reacting slowly as soon as a blur is applied, try reducing the value for Preview quality in the toolbar or decrease the value for Blur radius.
screenshot software free

Movavi Screen Recorder
Best for: simple UI
OS: Windows, macOS
Price: free trial, $59.95 for a lifetime version
G2 rating: 4.5 out of 5, 50 reviews
Movavi Screen Recorder is here to help you take screenshots with ease. You can also record your screen with the help of this screenshot software. You can set up all your recording parameters. Simply choose the area you want to capture, and you are good to go. The best thing about this application is that it has editing options. You can also take screenshots while recording a video. You can add text, lines, arrows, shapes, and change colors. After editing, you can export the screenshot to your desired location.
Key features:
- Edit screenshots
- Quick sharing
- Custom screenshot shortcuts
Pros:
- Simple and lightweight UI
- Quick screenshot editing
- Various export options
Cons:
- The free version has limitations
Windows Snipping Tool
Best for: basic screenshot needs
OS: Windows
Price: free
Windows Snipping Tool is one of the best free screenshot tools for taking easy screenshots. With this tool, you can edit or add notes to screenshots. Windows Snipping Tool allows users to utilize the various snip modes according to their usage. It allows using Paint 3D to rotate, resize, and enhance your screenshots. It is a free screenshot software that permits users to take screenshots with a click. There are various snip types like Free-form snip, Window snip, Rectangular snip, and Full-screen snip. With the Free-form snip, you can draw any free-form shape on your screen to capture that area. Rectangular snip will let you drag the cursor around the area you want to snip to form a rectangular frame. With Window snip, you can select a specific window you desire to capture. If you want to capture the full screen, the Full-screen snip is your option.
Key features:
- Completely free to use
- Serves basic needs of screenshots
- Easy to use
Pros:
- Easy snipping tool for Windows
- Various snipping modes
- One-click screenshot
Cons:
- Lacks editing features
- Extremely basic features
Windows Snip and Sketch
Best for: easy editing
OS: Windows
Price: free
PCMag rating: 3 out of 5
If you are looking for free screenshot software with easy editing features, Windows Snip and Sketch is a great option. It’s one of the best free screenshot software and comes built into Windows. If you cannot find this tool in your Windows OS, you can download the same from the Microsoft Store. You can launch this screenshot tool by pressing the Window key + Shift + S. The interface comes with a flat design and simple elements. The bar that you will find at the top of your screen will provide you with various capture options as you launch the tool. You can capture the whole screen, a custom portion, or a window. The best thing about this tool is that it comes with a timer of three seconds and ten seconds. It will give you plenty of time to set what appears on the screen and take perfect screenshots. After you finish taking your screenshot, the editor opens. There are various useful tools to modify your screenshots. Also, it comes with a protractor and ruler tool to keep your changes symmetrical and nice. You can crop your screenshots as per your liking. You can save your screenshots as JPG, GIF, or PNG files.
Key features:
- Simple interface
- Super easy editing
- Screenshot software that’s free
Pros:
- Comes with a highlighter, measurement, and eraser tools
- Easy capturing and annotation of screenshots
- Export screenshots to social media
- One of the best free screenshot tools for Windows
Cons:
- No option to capture video
- No option to capture scrolling windows
- Does not support voice recording
ScreenRec
Best for: instant sharing
OS: Windows, macOS, Linux
Price: free
G2 rating: 4.9 out of 5, 5 reviews
ScreenRec is a free screenshot tool that allows users to easily record their screens or take screenshots. The interface of this tool is pretty basic. Users can start to record using one hotkey. After recording or taking the screenshot, you can save the file or share it anywhere. The primary downside of this great tool is that it does not come with any editing tool. You can save your screenshots in any basic format you like. The platform generates a link that you can share with other people so that they can access your screenshots directly from the cloud. The best thing is that the link comes with encryption, and only people with the password can access the files. There is no limitation on taking screenshots. If you are searching for a go-to screenshot and screen recording software, ScreenRec could be a great option.
Key features:
- Hassle-free sharing option
- No watermarks or ads
Pros:
- Free usage
- Easy to use UI
- No limitation on screenshots
Cons:
- There is no feature to edit
Conclusion
Windows screenshot software can be a great way to take screenshots of your workflow. However, there are a few things you need to consider in order to take the best screenshots. By following these guidelines, you will be able to take perfect Windows screenshots that capture all the important details of your work.