
First of all, we would like to thank you for visiting this page and seeing the youtube views increase hack video above. Yes, it is completely worthy and we will show you why (keep reading!). But here’s a breakdown:
Make Sure Your Videos Are Embedding Enabled
You’ve spent ages creating an awesome video and now your viewers want to share it on their websites and blogs!
…but they can’t. Because you forgot to enable embedding.
*Gulp*
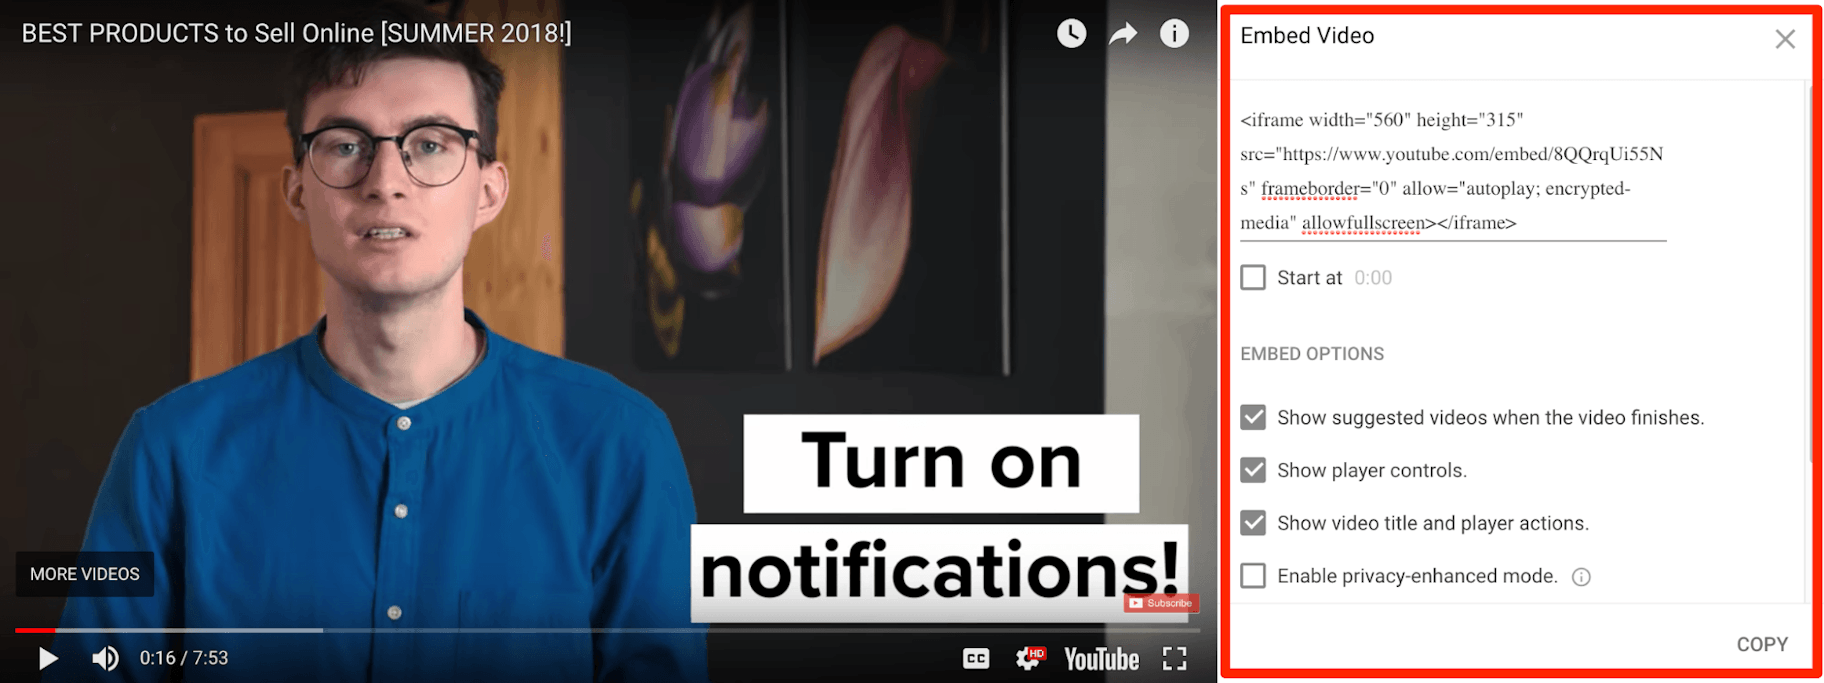
Allowing viewers to embed your video on their websites and blogs is an effective way for your brand to reach new audiences and get more views on YouTube. If a video has embedding enabled, when a viewer clicks ‘Share’ underneath the video window, YouTube will show them the ‘Embed’ option:
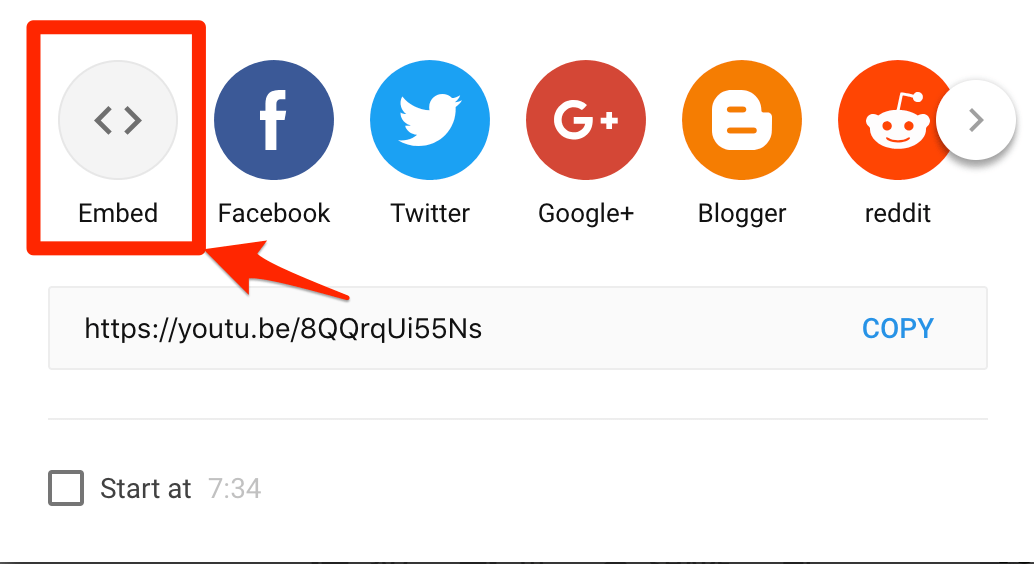
Once they click on this, they’ll be able to copy the video’s embedding code and paste it onto their blog or website.
To enable embedding, head to the Creator Studio and navigate to the video’s edit page.
Then click ‘Advanced Settings’ and scroll down to the “Distribution options” and make sure the “Allow Embedding” is ticked:
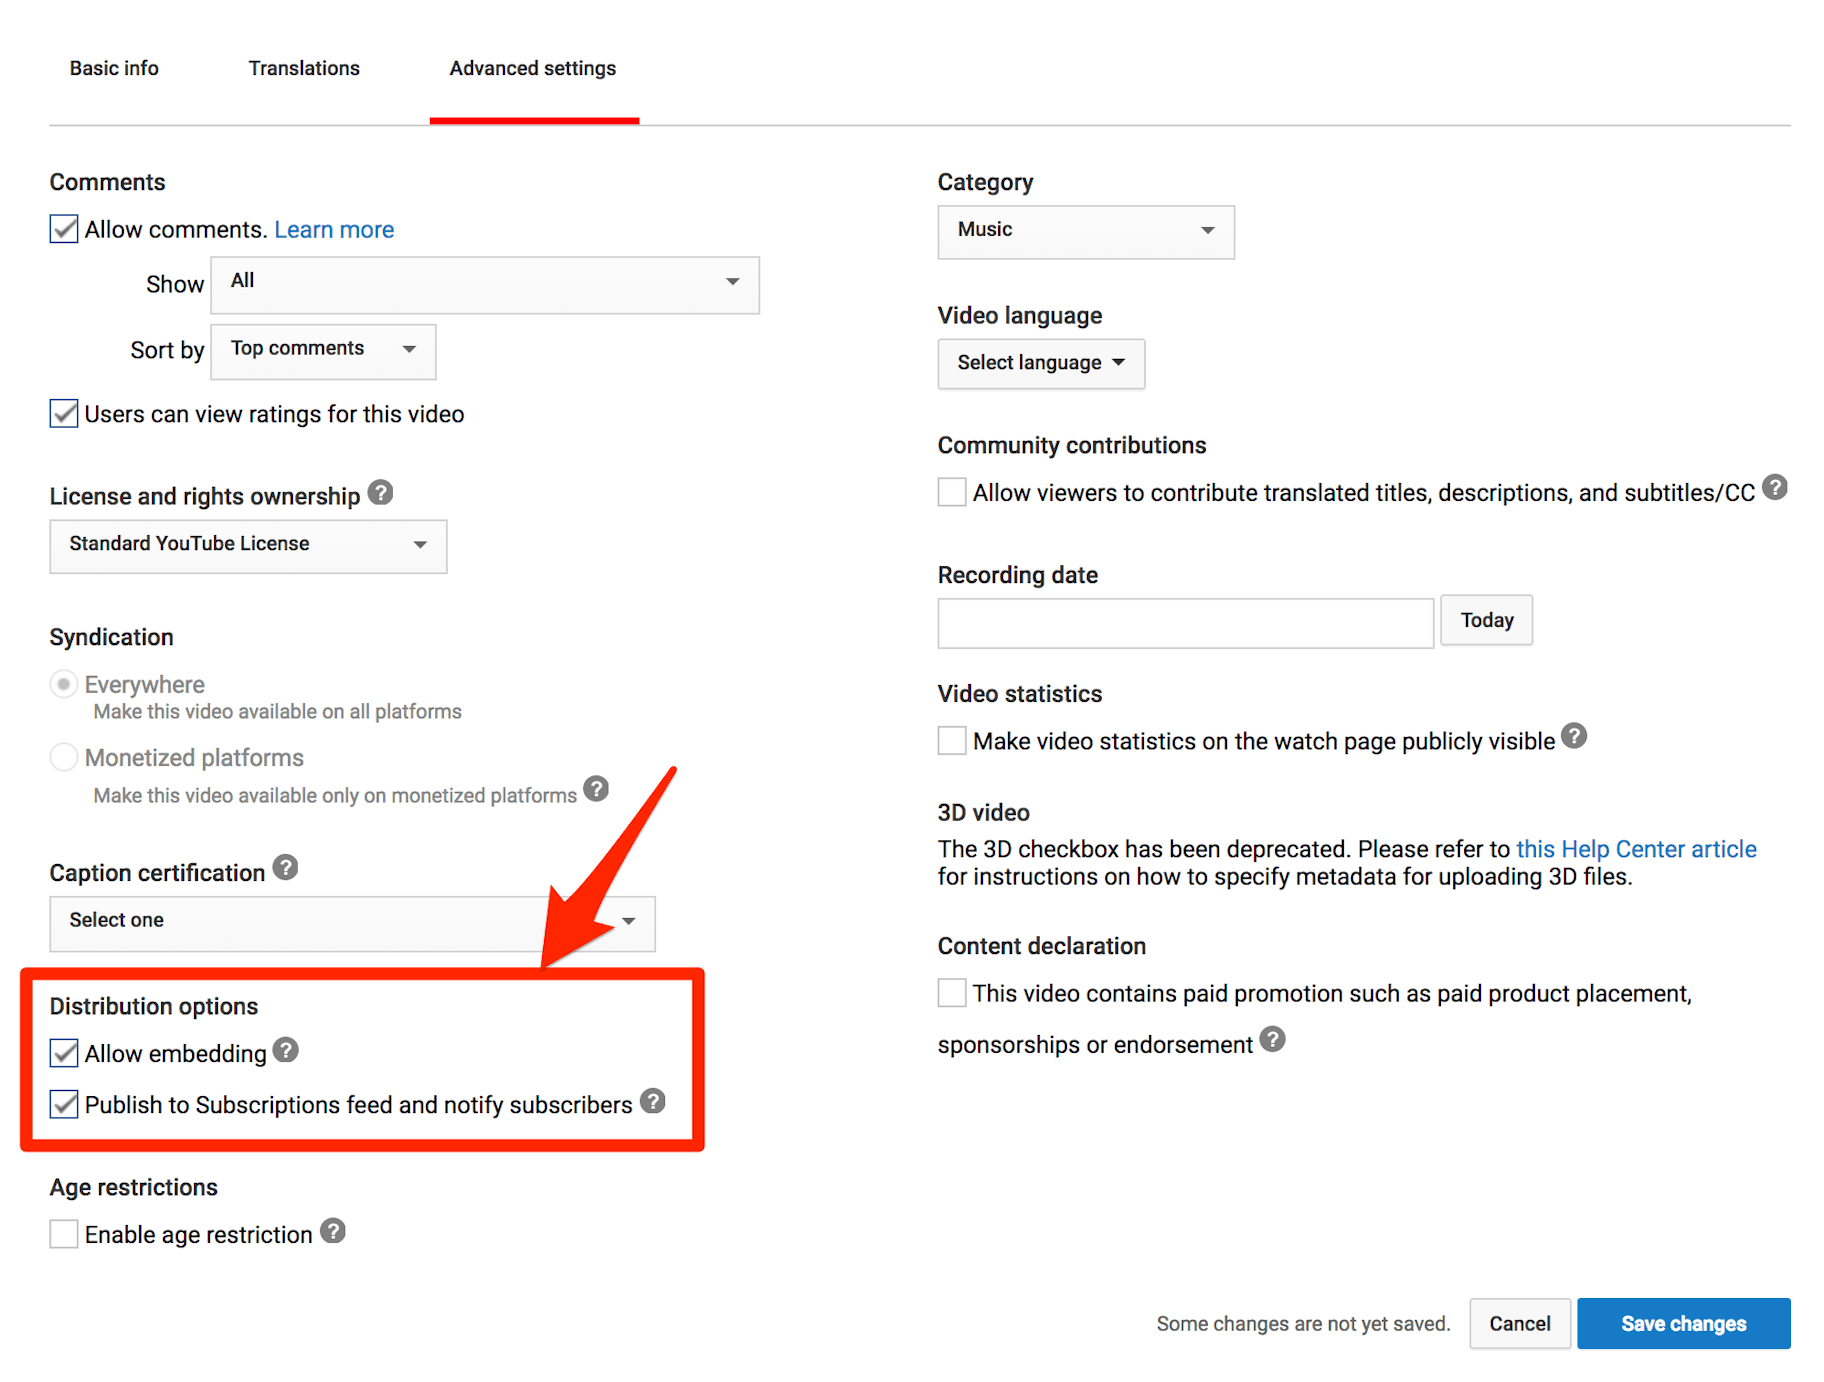
Bottom-line: Make sure your videos have embedding enabled to encourage viewers to share your content.
See the transcript of a video
YouTube automatically creates transcripts for every video created on its platform. Not only does this feature make videos more accessible, it also makes pulling quotes and copy a lot easier.
How to see the transcript of a YouTube video:
- From the video, click the three-dot ellipsis beside Save.
- Select Open transcript.
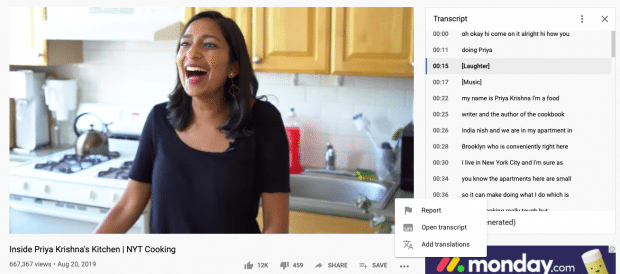
If you don’t see it, the creator likely decided to hide the transcript. Keep in mind that many video creators don’t edit their transcripts so it might not be perfect.
Create Compelling Content
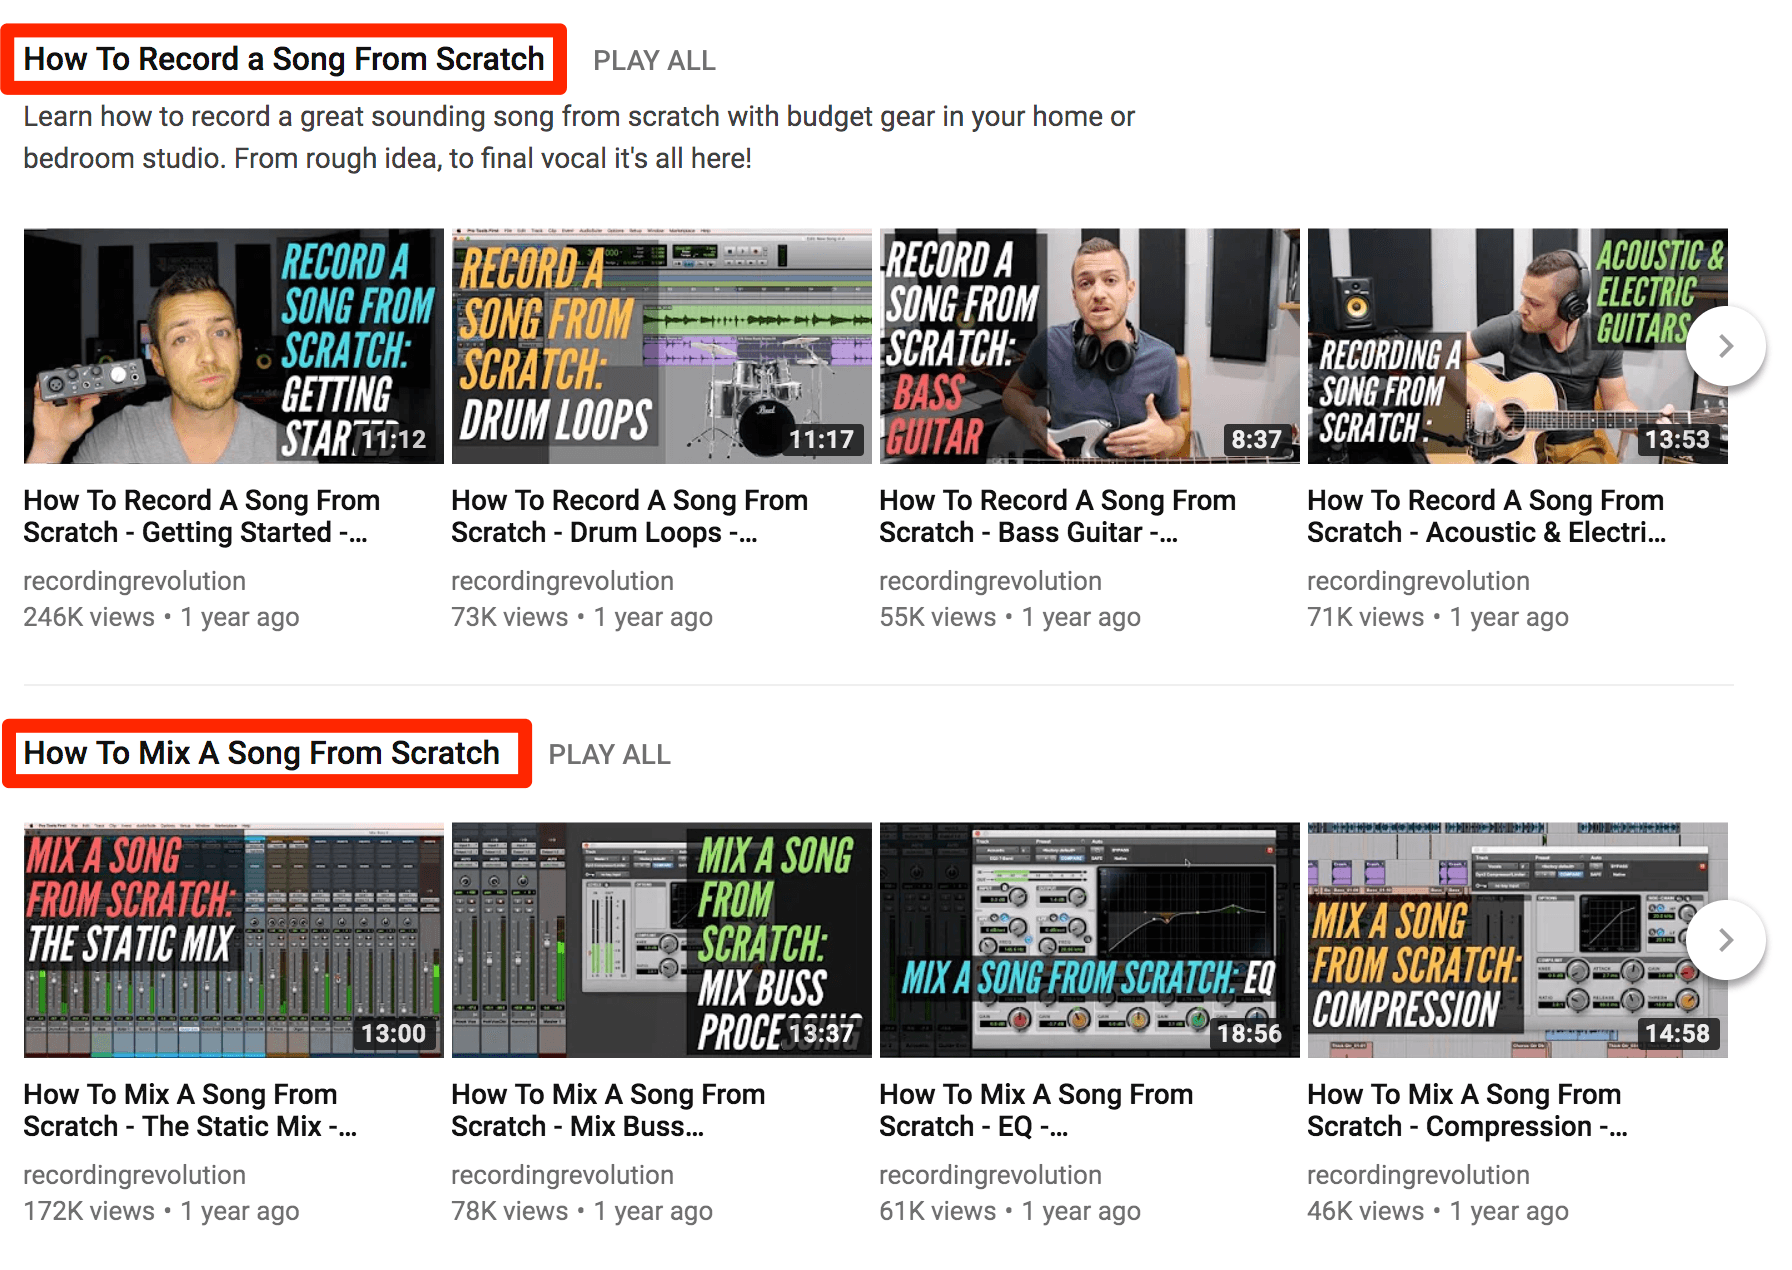
It won’t matter how many hacks or ads you use if your videos aren’t good. So how can you create compelling content that will get more views on YouTube? Well, one of the best ways is to create ‘how to’ videos:
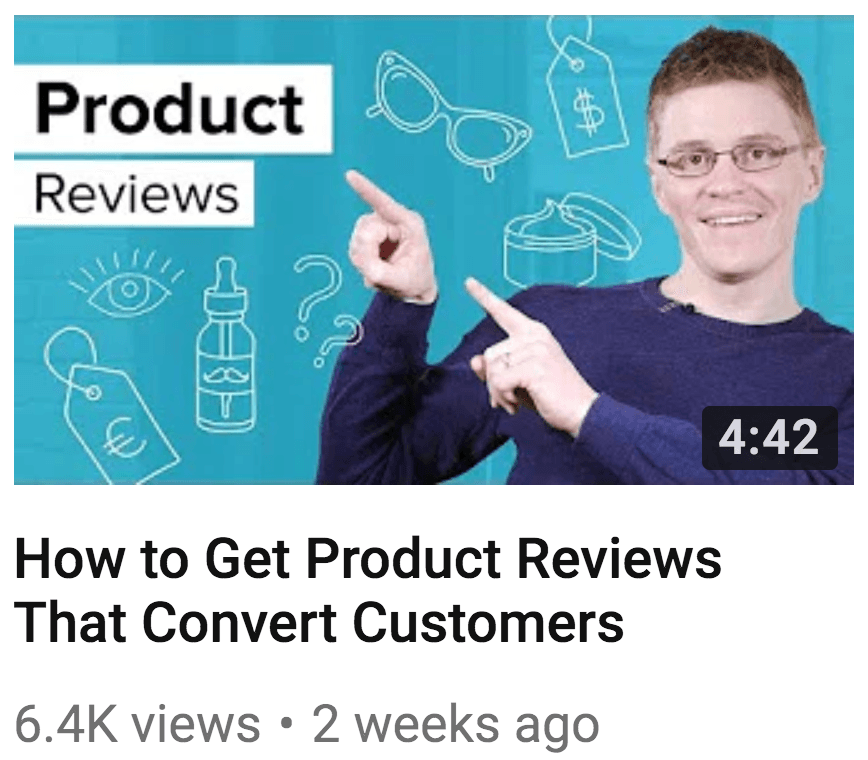
Simply identify what your ideal customers most want to know, and then create videos that meet their needs. Does this work? You bet. YouTube creator Graham Cochrane racked up 51 million YouTube views by focusing on how-to content.
Cochrane finds video ideas in the comments of his social channels. If that doesn’t work, he asks his community what they’d like him to make videos about.
Simple, right?
Cochrane said, “An amazing thing happens when you ask people what they need and want, and then you go and make it for them — they think you read their mind!” Bottom-line: Consistently create content that solves your ideal customer’s problems or meets their needs. It’s the way to develop a loyal community of fans and get more views on YouTube.
Add a Watermark to Your Videos
Watermarks allow you to gain more subscribers and free YouTube views by promoting your channel across all of your videos. Essentially, a watermark is just an image that you can set to appear on all of your videos — most brands use their logo. When a viewer hovers their mouse over a watermark, it prompts them to subscribe. Which is why the Shopify YouTube channel has chosen a watermark saying ‘subscribe’:
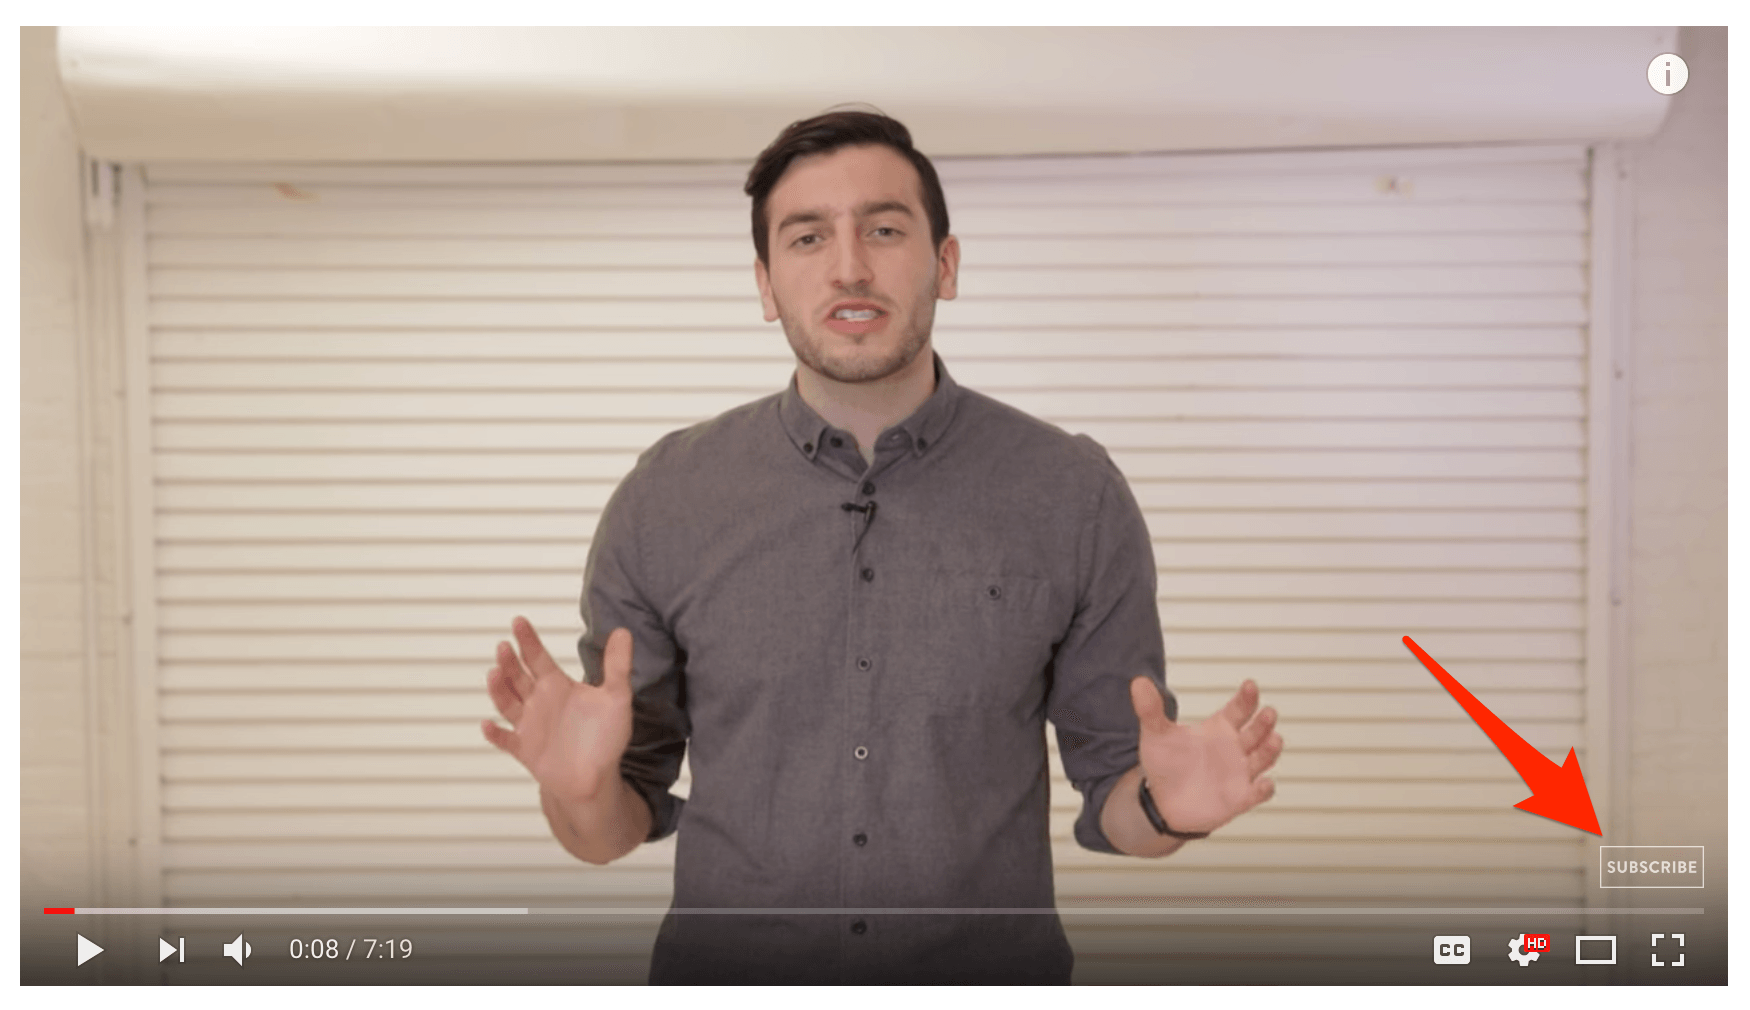
Once again, you need to verify your YouTube account to be able to upload a watermark. It’s worth pointing out that you can’t pick and choose which videos display watermarks and which don’t — they either appear on all of your videos or none of them.
To add a watermark to your videos head to the Creator Studio and click ‘Branding.’
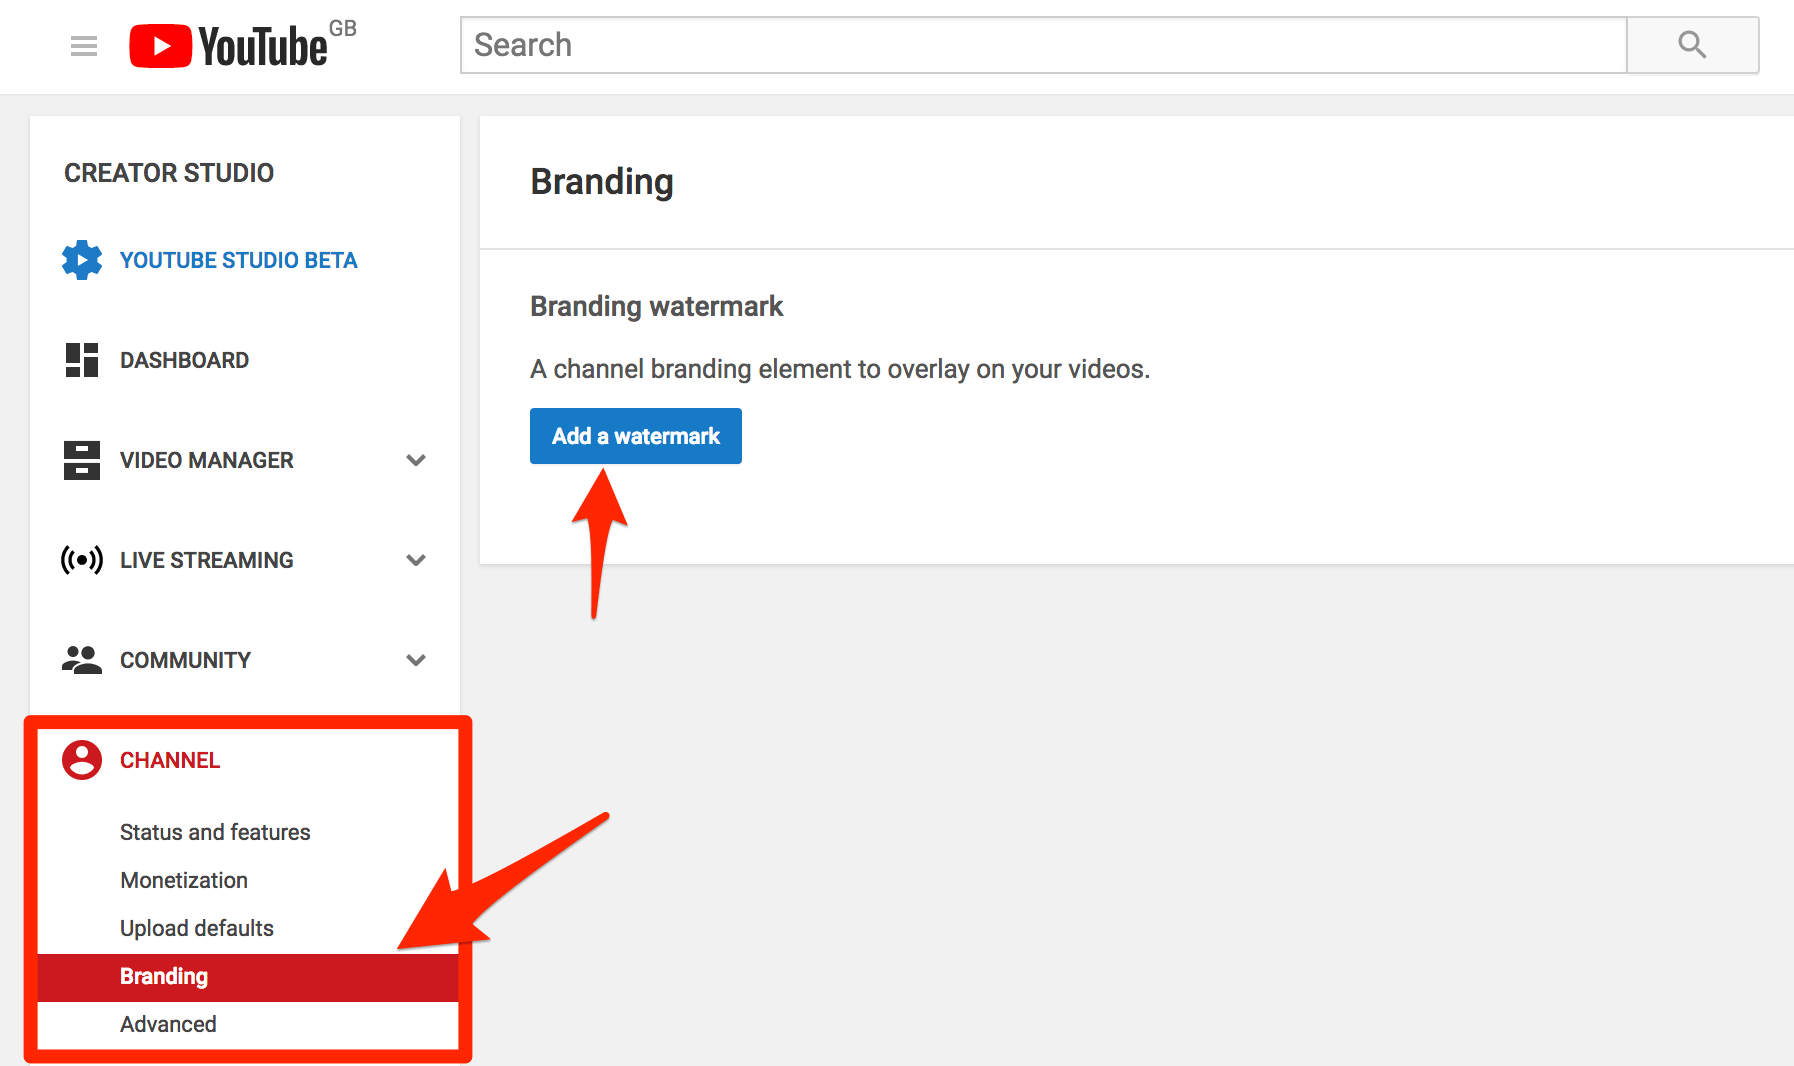
Then click ‘Add a Watermark’ and upload your image.
In summary, use this simple tool to promote your brand on your YouTube channel.
Tip: Design a watermark that is square, transparent, and above 50×50 pixels. As YouTube shrinks down watermarks when displaying them in the corner of the videos, creating a larger one will help ensure your branding is visible to your target audience.
Create closed captions to improve accessibility and SEO
Closed captions or subtitles make your content available to a larger audience. That includes viewers that are deaf or hard of hearing, or people watching the video with sound off. As a bonus, this also improves the search engine optimization ranking for your video.
There are two ways to go about this. You can either create subtitles or closed captions on YouTube, or upload a transcript file. We recommend that latter because you can save the file as you go and store it as a backup in case the video gets deleted by mistake.
Here’s how to create subtitles or closed captions:
- Sign in to YouTube Studio.
- From the left menu, select Subtitles.
- Click the video you’d like to edit.
- Click Add Language and select your language.
- Under subtitles, select Add.
- Enter your captions as the video plays.
Here’s how to upload a transcript:
- Sign in to YouTube Studio.
- From the left menu, select Videos.
- Click on the title or thumbnail of a video.
- Select More options.
- Select Upload subtitles/cc.
- Choose between With timing or Without timing. Select Continue.
- Upload your file.
- Select Save.
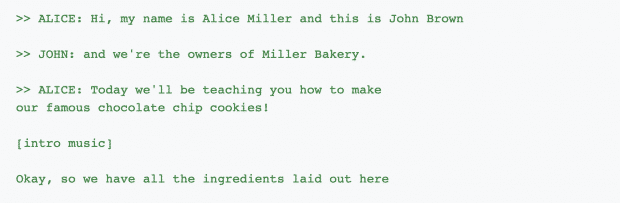
If you go this route, you’ll need to save your captions as a plain text file (.txt) to upload it to YouTube. Here are a few formatting tips, recommended by YouTube:
- Use a blank line to force the start of a new caption.
- Use square brackets to designate background sounds like [music] or [applause].
- Add >> to identify speakers or change of speaker.
Leave some time at the end of your YouTube video for an end screen call-to-action.
End screens appear in the last 5-20 seconds of a video, and direct viewers to different destinations of your choice. You can use them to encourage viewers to subscribe to your channel, watch another video or playlist, visit another channel, or an approved website.
How to do it:
Sign in to YouTube Studio.
Open the Videos page and select a video.
Select Editor from the left menu.
Select Add an end screen.
Note: End screens and cards are not eligible on videos made for kids. Linking to approved websites is currently only available to members of the YouTube Partner Program.
Create closed captions to improve accessibility and SEO
Closed captions or subtitles make your content available to a larger audience. That includes viewers that are deaf or hard of hearing, or people watching the video with sound off. As a bonus, this also improves the search engine optimization ranking for your video.
There are two ways to go about this. You can either create subtitles or closed captions on YouTube, or upload a transcript file. We recommend that latter because you can save the file as you go and store it as a backup in case the video gets deleted by mistake.
Here’s how to create subtitles or closed captions:
- Sign in to YouTube Studio.
- From the left menu, select Subtitles.
- Click the video you’d like to edit.
- Click Add Language and select your language.
- Under subtitles, select Add.
- Enter your captions as the video plays.
Here’s how to upload a transcript:
- Sign in to YouTube Studio.
- From the left menu, select Videos.
- Click on the title or thumbnail of a video.
- Select More options.
- Select Upload subtitles/cc.
- Choose between With timing or Without timing. Select Continue.
- Upload your file.
- Select Save.
If you go this route, you’ll need to save your captions as a plain text file (.txt) to upload it to YouTube. Here are a few formatting tips, recommended by YouTube:
- Use a blank line to force the start of a new caption.
- Use square brackets to designate background sounds like [music] or [applause].
- Add >> to identify speakers or change of speaker.
Organize Your SEO

Speaking of categorization, for all your activity to be fruitful, you must dive into YouTube SEO and comprehend how it works. The main instrument of your power here would be keywords. This is the tool that triggers the algorithms of the network and advances you to climb up in ranks. Proper keywords improve the perception of your content multiple times, so you have to do thorough work on the subject.
How To Define The Terms You Need
This task is easy and hard at the same time. For the promising result, you must engage in a deep analysis of your niche, competition, and user behavior. The simplest method is to gaze through the search results that appear when you enter a suggested keyword. Your goal is to learn a perfect balance between general and specific terms.
How To Imply The Keywords
You possess three main options to input your keywords:
- Titles
- Captions
- Video descriptions
Each would be an assistance for YouTube systems to categorize your materials properly and suggest it to the right crowd, granting unstoppable growth of stats on your profile. By using the right terms you prepare your content easily discoverable for users, and you ensure that it will emerge in the suggested category for users who showed interest in the industry you occupy.
Tags
Also, to help the system recognize your content, you should add tags to your videos. This can be done within the Basic info section, in the video uploader. Tags should be entered into the field separated by commas. Try to avoid long and complicated words, and again, preserve the balance between general and specific terminology.
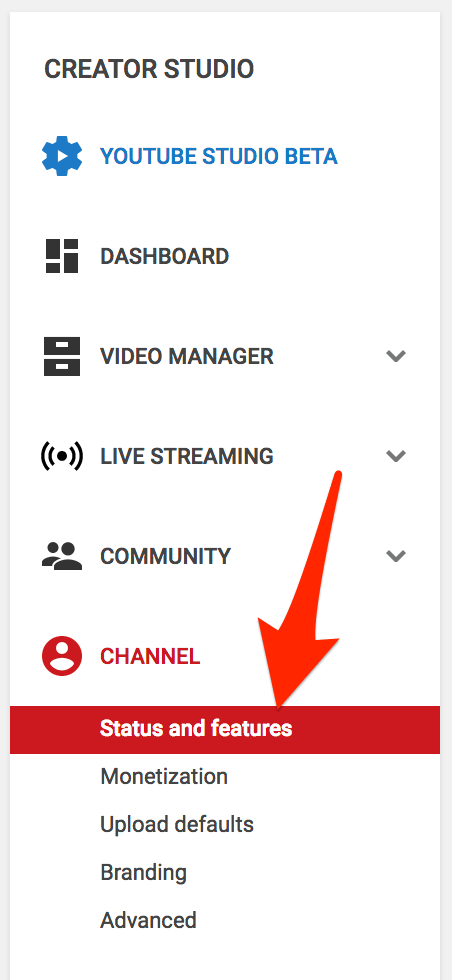
Promote Other Videos with End Screens and Cards
Cards and end screens are tools that you can use to promote your videos to get more views on YouTube. First, you’ll need to verify your YouTube account to access these features. To do this, click on your profile picture in the top right, and then click ‘Creator Studio’. Next, click on the ‘Status and features’ tab:
On this page, you’re able to view extra YouTube channel features and set them up. Now let’s take a closer look at end screens and cards.
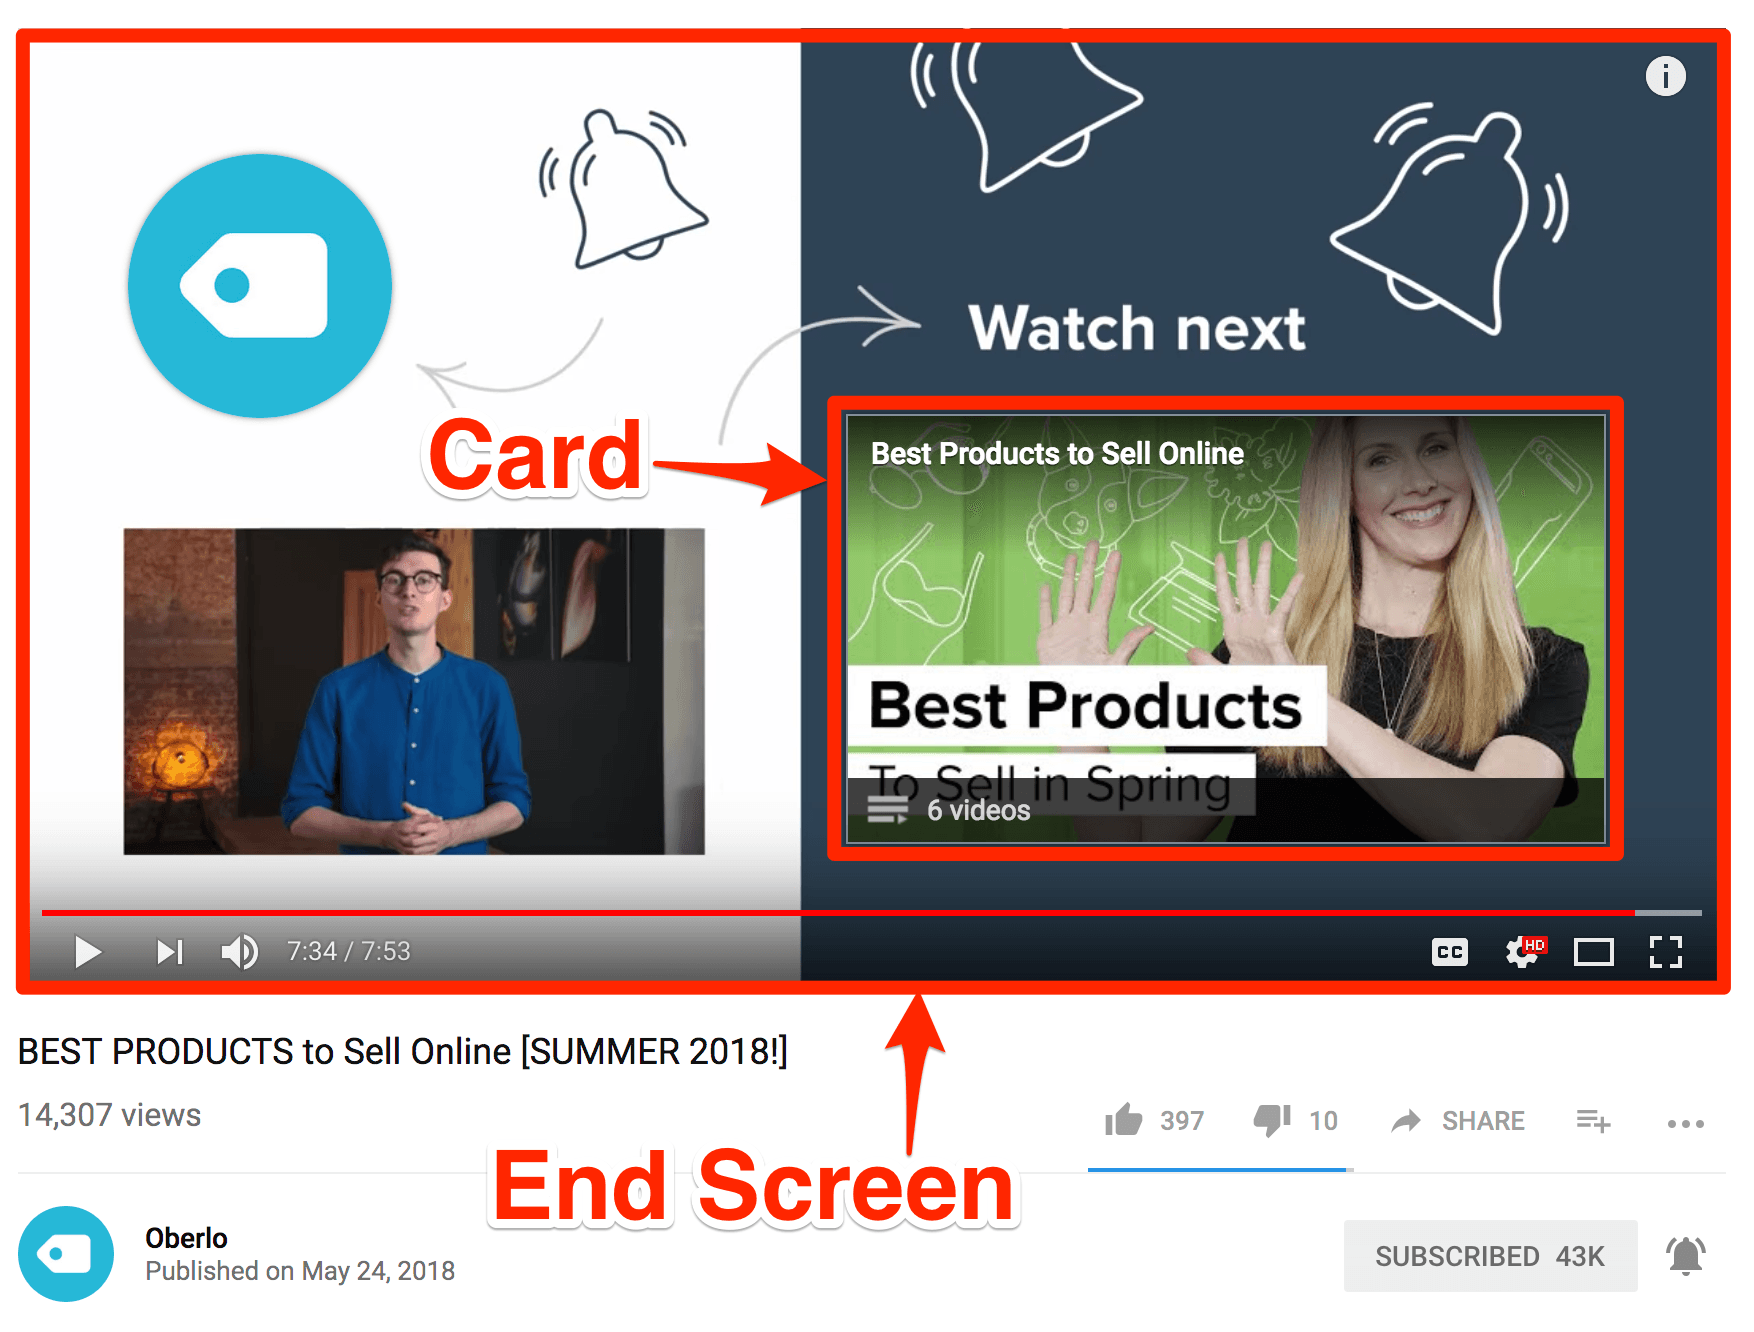
An end screen is a dedicated frame that you can place at the end of your videos to wrap things up, and highlight calls-to-action.
Cards are a tool that you can set to pop-up anytime in the video. You can set these to direct people to another video or playlist, or you can create a poll card which is a great way to ask viewers what they’d like to see more of (remember tip number 1?).
You can see both at work in this example from the Oberlo YouTube channel:
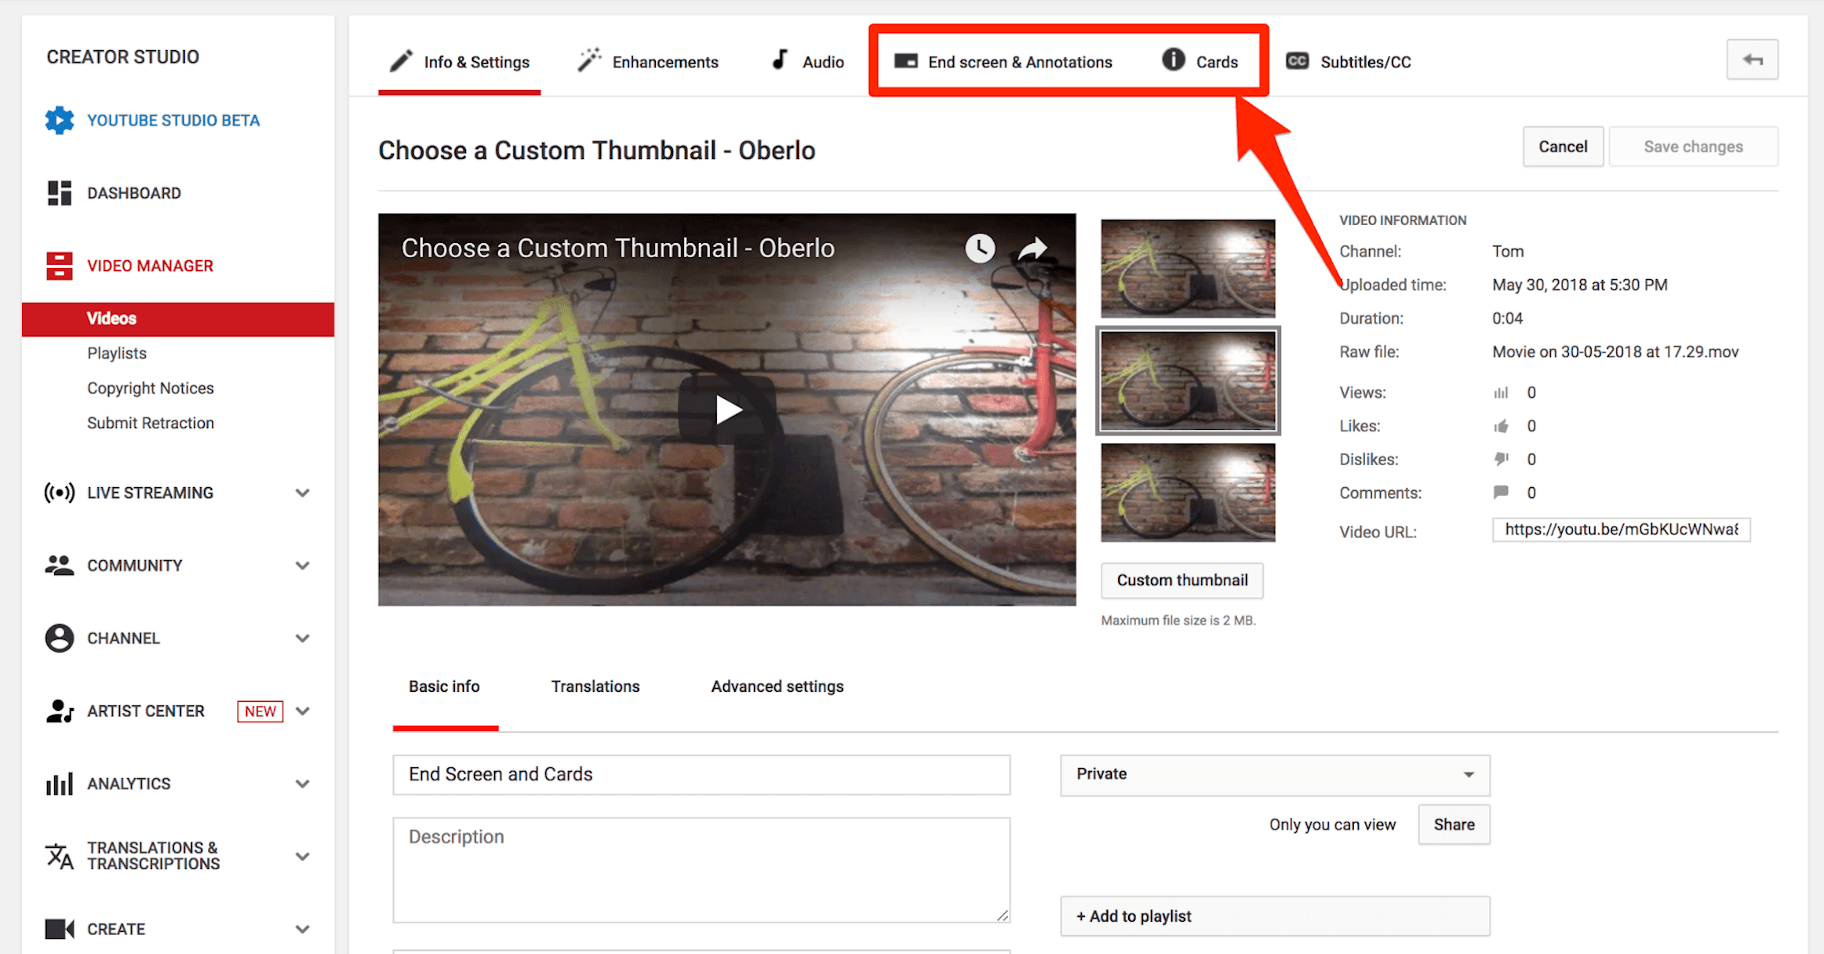
To add end screens and cards to your videos, go to the Creator Studio and click ‘Video Manager,’ then click ‘Videos.’ Find the video that you want to add the end screen card to and click ‘Edit.’ Once you’re on the video editor page, you can add end screens and cards by clicking the menu items at the top of the page:
End screens and cards are powerful tools, so make sure you use them to present calls-to-action in your YouTube videos.
Pay For Promotion

Along with third-party paid services, some options are provided by YouTube itself. The network offers six types of ads that can be utilized for successful growth:
- Trueview Ads. This is the most widespread Ads that we notice on the platform. It’s a short (no longer than 6 minutes) film that is displayed before or while a viewer attends to a video. It is possible to skip it, and advertisers only monetize it as the watch time is over 30 seconds. Users can choose what kind of ads they prefer to see, hence your promo videos will reach an interested audience.
- Non-skippable in-stream Ads. This type of commercial is the same thing as Trueview, but it is, surprisingly, non-skippable.
- Bumper Ads. This advertising is also displayed before the beginning of the actual video, and it has to be smaller than 6 seconds. Usually, those are exploited as short calls-to-action and become part of a bigger promotion campaign.
- Sponsored cards. The most subtle form of ads that is present on the platform. It usually appears as a small info icon at the upper right corner and can be expanded manually by a user.
- Overlay Ad. That’s probably YouTube’s classic form of commercial. It is a small banner at the underside of the video. It can contain either text or a picture and a link.
- Display Ads. These are also classic commercial banners that are implied to the YouTubes interface. For the matters of channel promotion, this would appear the least beneficial type of ad.
All other types, excluding maybe overlays, are quite helpful if you yearn to achieve more views, likes, or subs to your profile. That is because YouTube ranking systems are smart and properly organized content is winning the audience that is considered as the target group.
Create closed captions to improve accessibility and SEO
Closed captions or subtitles make your content available to a larger audience. That includes viewers that are deaf or hard of hearing, or people watching the video with sound off. As a bonus, this also improves the search engine optimization ranking for your video.
There are two ways to go about this. You can either create subtitles or closed captions on YouTube, or upload a transcript file. We recommend that latter because you can save the file as you go and store it as a backup in case the video gets deleted by mistake.
Here’s how to create subtitles or closed captions:
- Sign in to YouTube Studio.
- From the left menu, select Subtitles.
- Click the video you’d like to edit.
- Click Add Language and select your language.
- Under subtitles, select Add.
- Enter your captions as the video plays.
Here’s how to upload a transcript:
- Sign in to YouTube Studio.
- From the left menu, select Videos.
- Click on the title or thumbnail of a video.
- Select More options.
- Select Upload subtitles/cc.
- Choose between With timing or Without timing. Select Continue.
- Upload your file.
- Select Save.
If you go this route, you’ll need to save your captions as a plain text file (.txt) to upload it to YouTube. Here are a few formatting tips, recommended by YouTube:
- Use a blank line to force the start of a new caption.
- Use square brackets to designate background sounds like [music] or [applause].
- Add >> to identify speakers or change of speaker.
Conclusion
There you have it. useful hacks to boost your views.
Surprisingly, it is not that difficult. If you work hard to make videos that really help people, you’ll watch the views roll in.
Then you can send that traffic to your website, or you can ask people to subscribe to your list for more content.
Every other business in the world is running Facebook and AdWords ads, and as a result, it’s hard to stand out on those platforms.
YouTube is a different story. It’s surprisingly easy to generate lots of views using the YouTube SEO tips I’ve shared with you.
You don’t need a huge budget to start making great videos. You can produce a viral video using just the phone in your pocket and a free video editor.
The best channels stand out because they have something unique to offer.
If you have a unique value proposition of your own, and if you go the extra mile to create videos people love, you can become very successful on YouTube.