
The purpose of the watermark in MS powerpoint is to allow users to know whose presentation it is or where it came from. It helps you to distribute quality content without losing your identity. And now, every one of us just wants to remove this watermark.
Here are some methods for you to remove background graphics with ease.
Part 1: How to Remove the Watermark in PPT Document
If the watermark in the PPT was added in the Slide Master, we can remove it easily using Master View. But if it’s stamped on a picture, things get a bit more complicated and you need to use the method introduced in Part 2.
Steps to remove watermark in PPT using Slide Master
Step 1:Open the PPT document. Click on the View tab and then click the Slide Master button. Step 2:In the thumbnail pane on the left of your screen, click on the first thumbnail.
 Step 3:Click on the text or picture watermark to select it. Then hit the Backspace or Delete key on your keyboard to remove the watermark from the PPT.
 Step 4:Click the Close Master View button at the top and then you will find the watermark is removed from all slides. If you don’t find the button, check at the top of the PPT window if you are on the Slide Master tab.
Part 2: How to Remove the Watermark from a Picture in PPT
Sometimes the watermark you see in a PPT slide is stamped on the picture and you cannot make it disappear using Microsoft PowerPoint. Fortunately, we have a special way to remove the watermark from the picture in PPT. That is to use Aiseesoft Free Watermark Remover Online. Here are several key features of it:
- Remove any watermark from pictures with an advanced algorithm.
- Accept image files of any size and various formats like JPG, BMP, PNG, etc.
- Work purely online without any downloading or installation.
- Preview the result in real-time and conveniently re-edit multiple times.
Steps to remove watermark from a picture in PPT
Step 1:Save the watermarked image from the PPT document to your computer. Then go to https://www.aiseesoft.com/watermark-remover-online/. Click the Upload Photo button and upload the picture with a watermark. Step 2:You can find three selection tools at the top and an eraser icon. Use any of the selection tools to highlight the watermark.
 Step 3:Click the Remove button at the top of the interface to remove the watermark. Then click the Save button in the bottom right corner to download the edited image file.Step 4:Replace the original picture in the PPT document with the new one from which you just removed the watermark.
How to Insert and Remove Watermarks in Microsoft PowerPoint
1. Go to View tab, click Slide Master in Master Views section. You’ll find the newly added Slide Master tab next to File.

2. Switch to Insert tab, then you can click WordArt in Text section, and choose a style you like to insert it.
Input the text in the textbox. Here I entered “WATERMARK”.

3. You can drag the dotted frame to adjust location, size and direction. What’s more, you can click it and then go to Format (Drawing Tools) tab, expand the drop-down menu of Text Fill, choose any color you like, or hit Gradient – More Gradients… to evoke the Format Shape pane.

4. Here you can change the Transparency of the Text Fill as well as Text Outline. It will make the WordArt you inserted more like a watermark.

5. If you don’t want a pure text watermark, you can choose a shape from the list of Shapes in Insert tab. The way to adjust the inserted shape is almost the same. Furthermore, you can combine a shape and a WordArt to make it more informative.

6. After that, you can hit Close Master View in Slide Master tab to quit it.

7. You can see the watermark can’t be modified or deleted by normal means now, no matter it’s created by insert shape or insert WordArt. If you truly want to remove it, the only way is to enable Slide Master again, select the watermark and press [Del] key to delete it.

Or try this!
In PowerPoint, you can put a text background in your slides to get that watermark effect.
- To add a watermark to all the slides, Select View > Slide Master. Scroll to the top of the thumbnail pane on the left, and select the first item, the slide master.
- Select Insert > Text Box, and then click and drag to draw the text box on the slide master.
- Type the watermark text (such as “DRAFT”) in the text box.
- To change the alignment of your watermark text, click and hold the rotation handle at the top of the text box while you move your mouse left or right.
- Select the text in the text box. Choose a light font fill color, and then make any other changes that you want to the font and style. (If you do not see the Format tab, be sure you’ve selected the text box.)
- Exit Slide Master. All slides except title pages will have the text.
Delete a Text or Picture Watermark
Users can add text or watermark pictures on top of existing slides by editing the Slide Master — the template that defines the layout and overall appearance of the individual slides. Conversely, to delete a text or picture watermark, delete it from your presentation’s Slide Master.
VIDEO OF THE DAYhttps://imasdk.googleapis.com/js/core/bridge3.489.0_en.html#goog_8066771930 seconds of 30 secondsVolume 0%
Step 1
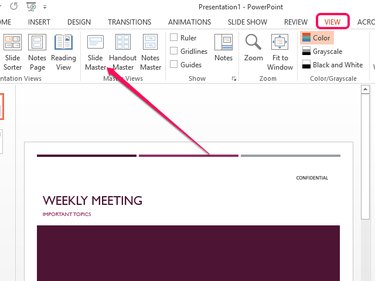
Image Credit: Image courtesy of Microsoft
Open the View tab and click the Slide Master icon. After clicking the icon, PowerPoint enters Slide Master view, a special mode that lets you edit your Slide Master and the individual layouts your presentation may use.
Step 2
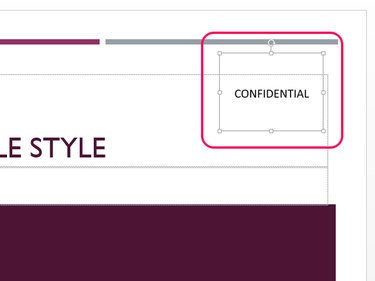
Image Credit: Image courtesy of Microsoft
Click the text or picture watermark to select it and press the Delete key to remove it.
Step 3

Image Credit: Image courtesy of Microsoft
Select Close Master View to save the Slide Master and return to your presentation.
Delete a Background Watermark
Step 1
Select the slide that contains the background watermark you wish to delete.
Step 2
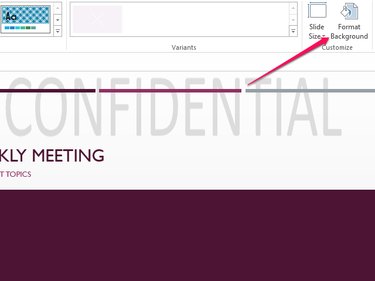
Image Credit: Image courtesy of Microsoft
Open the View tab and select Format Background.
Step 3
Remove a background graphic or watermark from your slides in PowerPoint for Mac
PowerPoint for Microsoft 365 for Mac PowerPoint 2021 for Mac More…
Here’s how to remove the picture background or watermark from your slides.
- On the View menu, select Master > Slide Master.
- In the thumbnail pane on the left, click any slide layouts that have the picture watermark you want to remove.
- On the Slide Master tab, click Background Styles.

- Click Format Background.

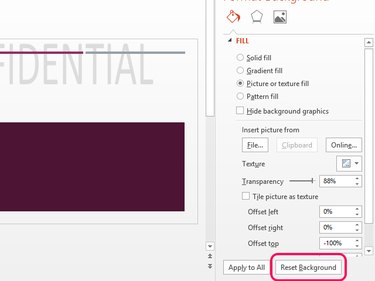
- In the Format Background pane, under Fill, click Solid Fill.
- Click the Color button and select white, or any other color you like.

- If you want to remove the background from all slides, click Apply to All.
Conclusion
There is a wide range of magic, and everyone can choose what he wants. However, I present to your attention the one – Remove Watermark From Powerpoint – which will help you cope with this specific task.